Welcome to Dan Trials and Error! This website is my personal space where I document the various things I’m working on, from tackling unplanned yet inevitable car and Land Rover rebuilds, to building mountain bikes (which I sometimes ride), along with other hands-on adventures. It’s primarily a way for my friends and family to stay updated on what I’m up to, while also serving as a reference for myself to track progress and organise my thoughts. If you’ve stumbled across this site by chance, feel free to explore and follow along—especially if you enjoy seeing a guy who just can’t resist a challenging project. And if you’re into great music, be sure to check out NoNameRadio.co.uk—you might just find your new favourite station!
20th of October 2024
Post 3: Ford Mondeo (Black 2005 2.0 TDCi Estate) – Power Steering Pump and Rear Wheel Bearings
Power Steering Pump Considerations and Rear Wheel Bearings Replacement
The black Mondeo has started showing signs that the power steering pump may be failing. After researching options, I’m considering whether to go for a genuine Ford part or an aftermarket alternative. While I haven’t yet ordered the new pump, I’m leaning towards the genuine Ford option for its better long-term reliability, even though it comes with a higher upfront cost.
In addition to the power steering issue, I’ve ordered two rear wheel bearings as part of the car’s ongoing maintenance. Given that we’ve only had the car for a few months, I’m prioritising high-quality parts to ensure it stays in good working order for the long term.
Key Points:
Ordered two rear wheel bearings to maintain reliability.
Diagnosing a potential power steering pump failure in the Mondeo.
Considering the pros and cons of genuine Ford versus aftermarket parts, with no final decision made yet.
20th of October 2024
Post 2: Land Rover Defender – Heater Box Restoration and Axle Progress
Restoring the Heater Box and Upgrading the Front Axle
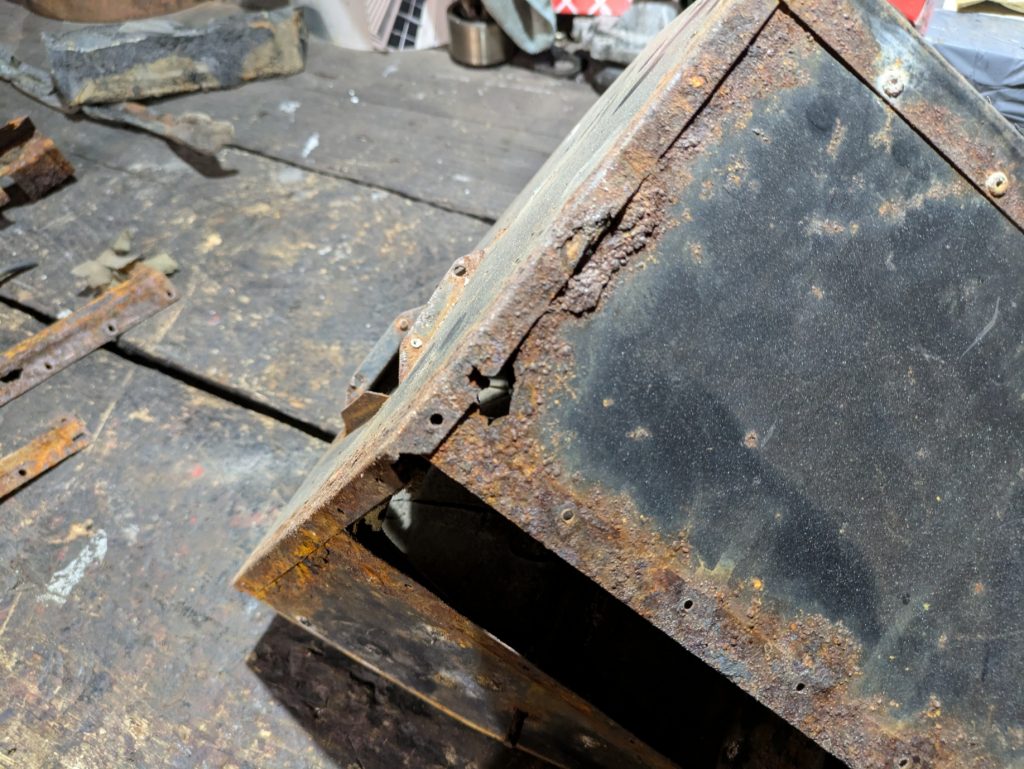
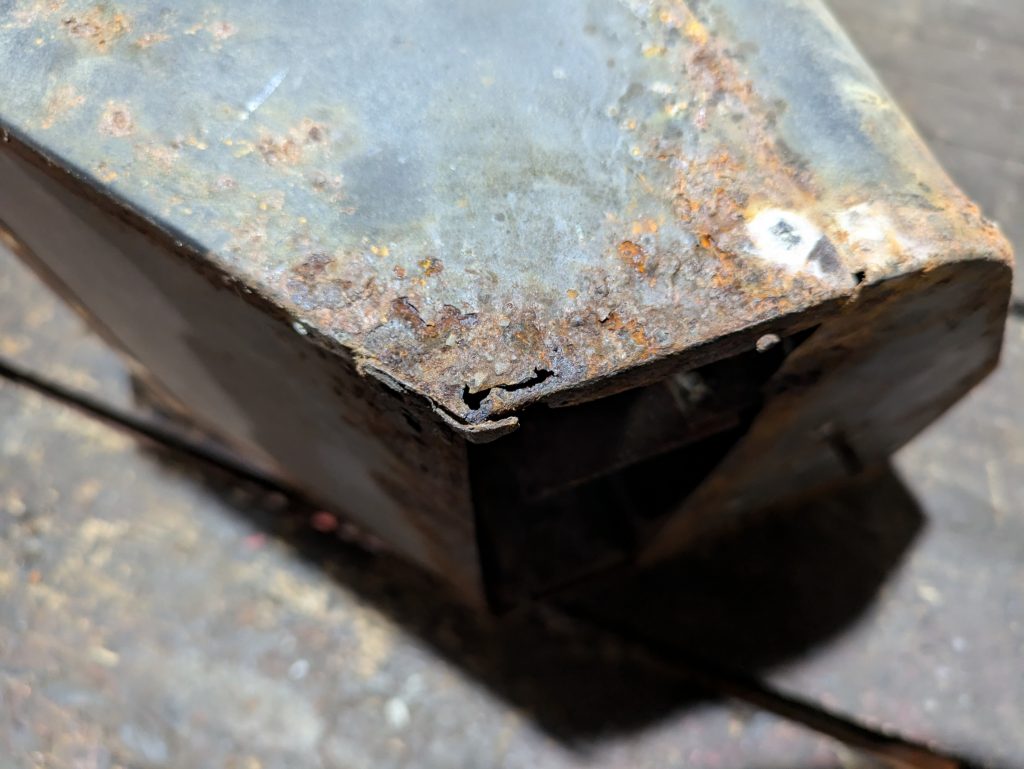
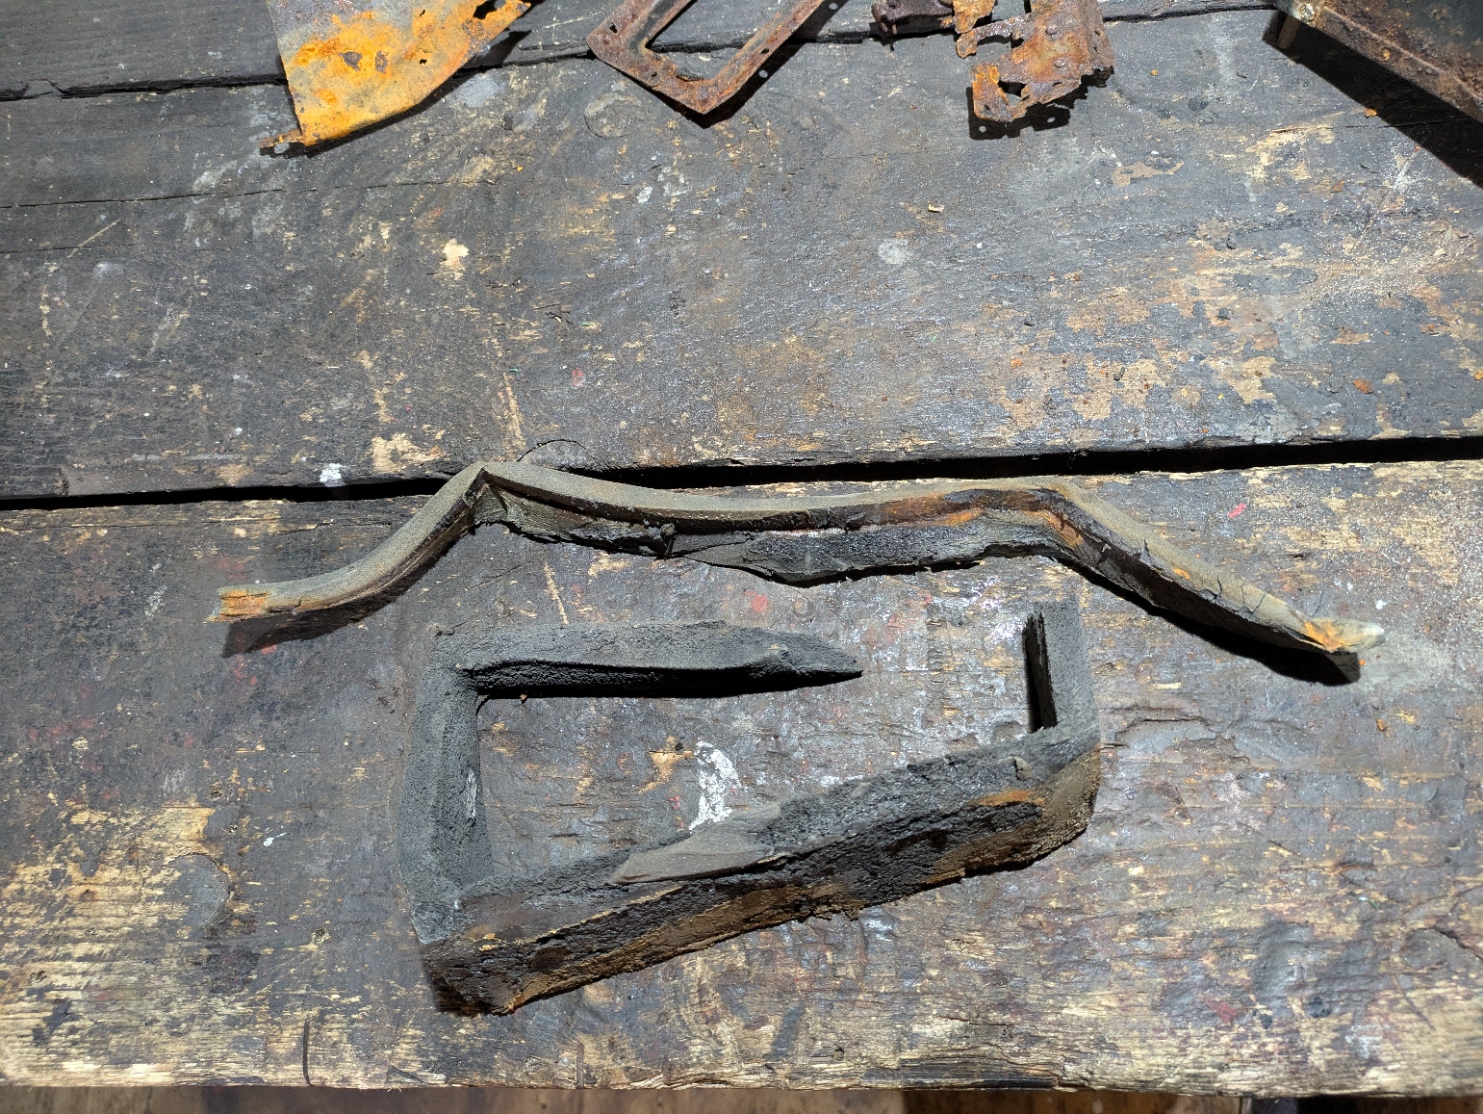
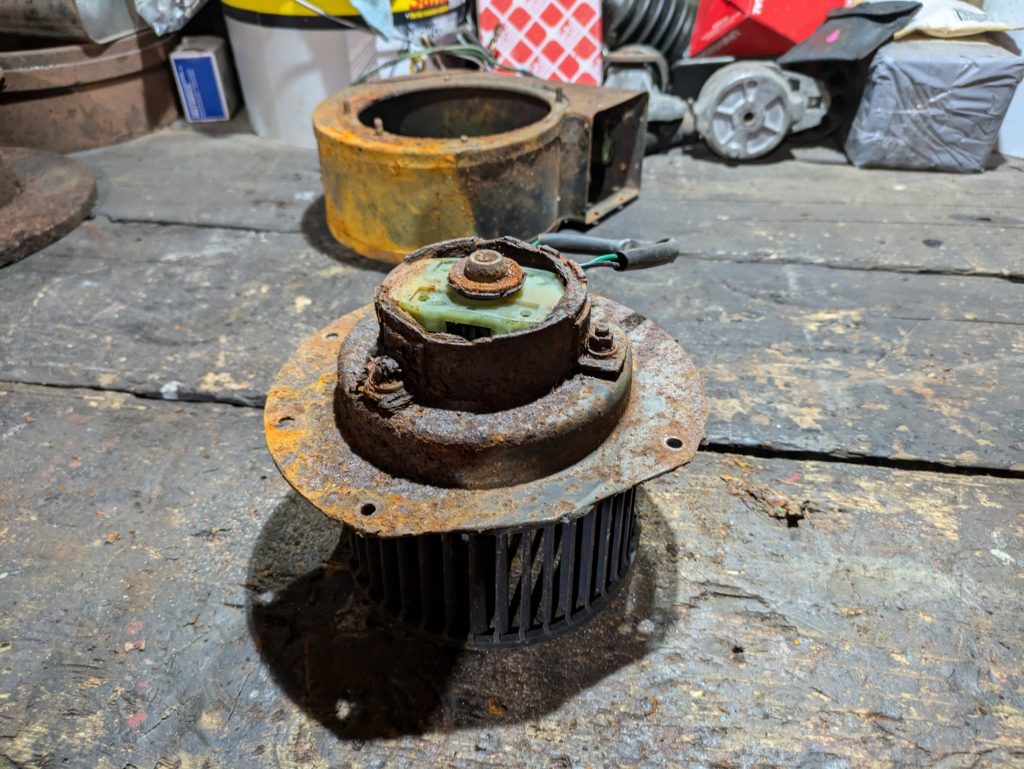
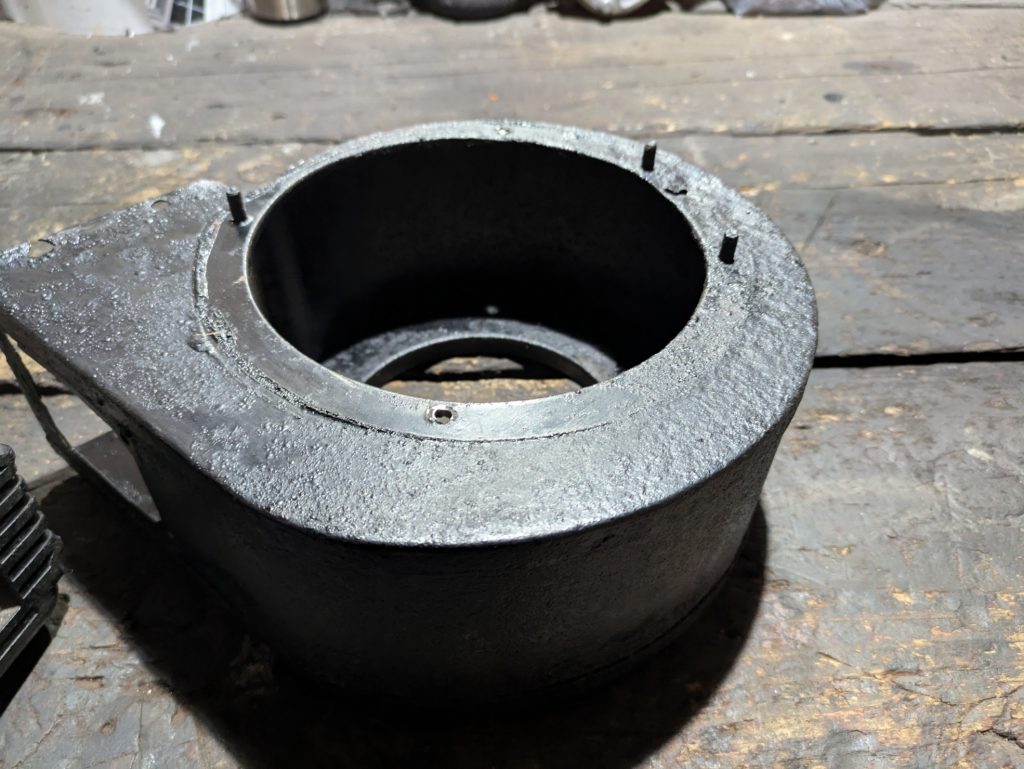
Progress on the Land Rover Defender continues, starting with the restoration of the heater box. The original unit had significant rust, so I cleaned it using electrolysis, which stripped away most of the corrosion. After that, I applied Tetrosyl black chassis paint for protection. In a few areas where the rust had eaten through the metal, I opted for a practical and temporary solution by using duct tape to seal the holes. While it’s not a permanent fix, this approach allows me to keep the heater box functional without committing to an expensive replacement just yet. I’m planning to upgrade the heater matrix to an Allisport unit, which requires modifications to the heater box anyway, so I’ll address those rusted areas fully during that process.
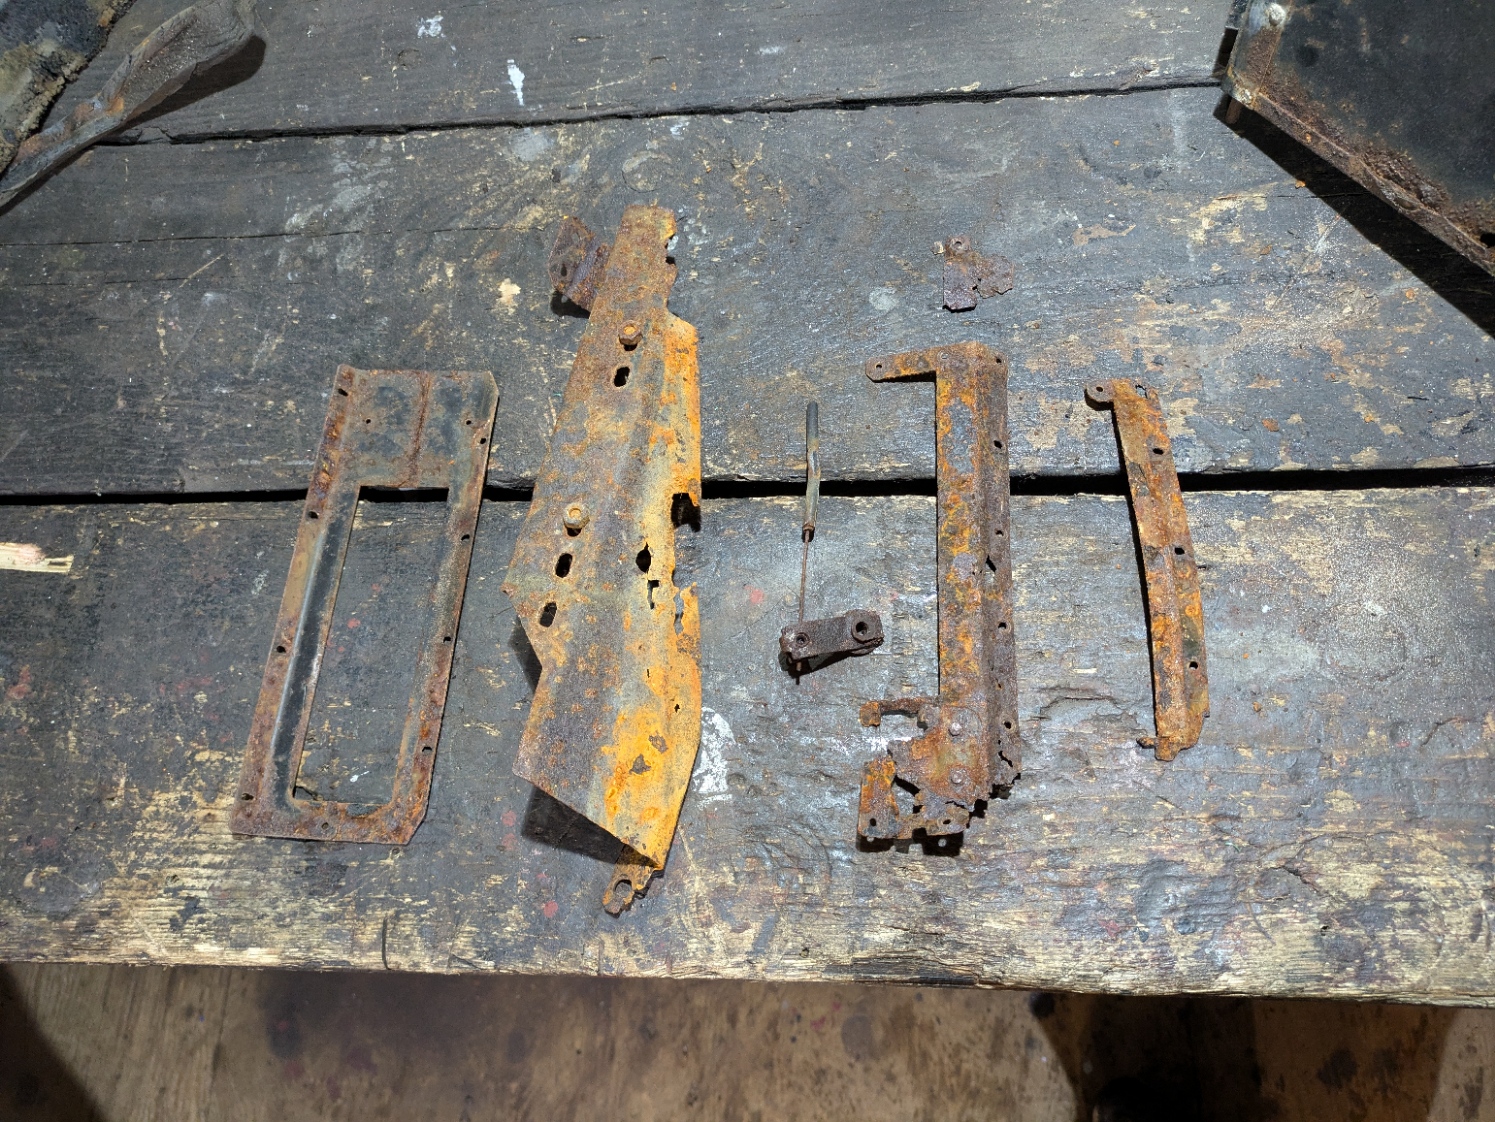
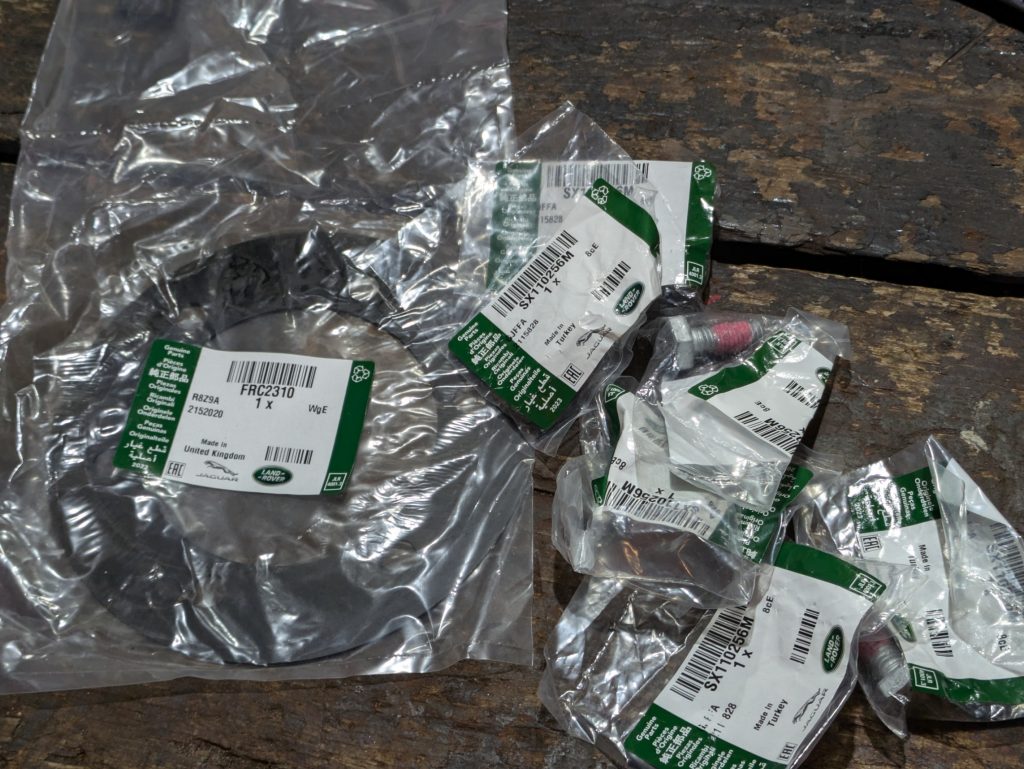
I’ve also received the genuine Land Rover heater box to bulkhead seal, ensuring a proper fit for this crucial component. Additionally, I’m using galvanised brackets that have been modified to fit the Allisport heater matrix, a worthwhile upgrade due to its improved efficiency, especially in cold conditions.
During the process, I had to repair two snapped studs that hold the blower motor in place. I drilled them out, tapped the holes, and secured new studs with Araldite epoxy. This repair will ensure the blower motor is securely mounted without causing issues later on. I’ve also ordered the RDX Big Power Fan and am planning to upgrade the heater blower resistor to an RDX resistor. While I haven’t found specific reviews about its performance, aftermarket resistors like the RDX are typically built with modern, heat-resistant materials, which can offer improved durability over older original components. Placing it inside the fan housing also helps prevent overheating, a common issue with older resistors.
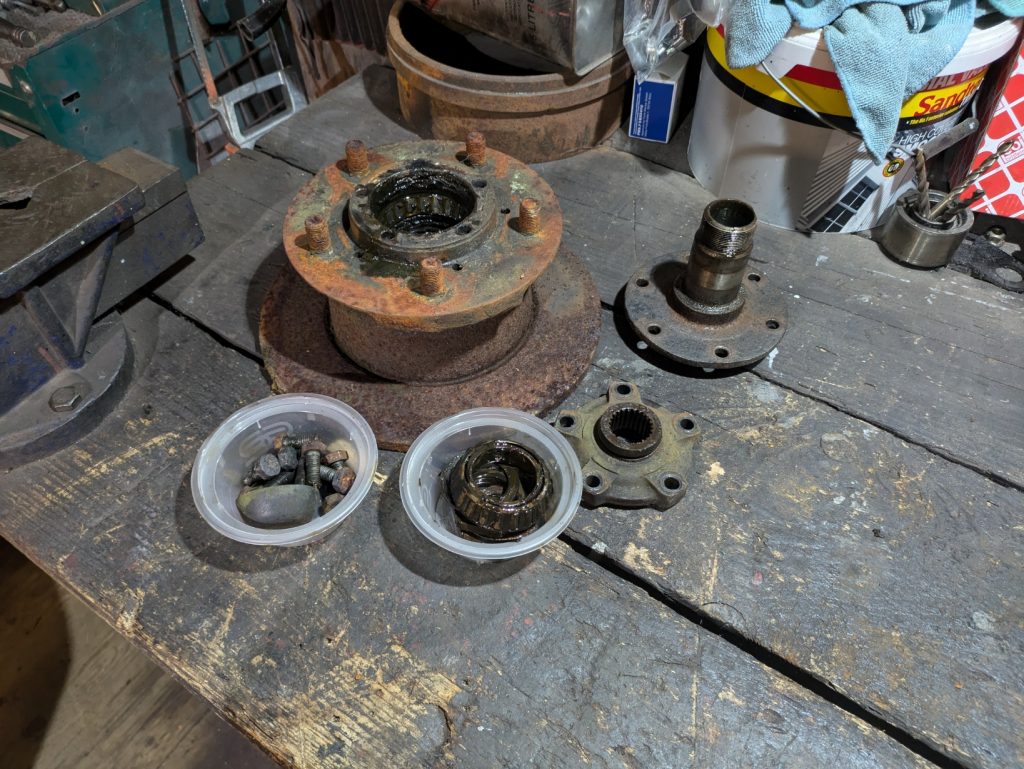
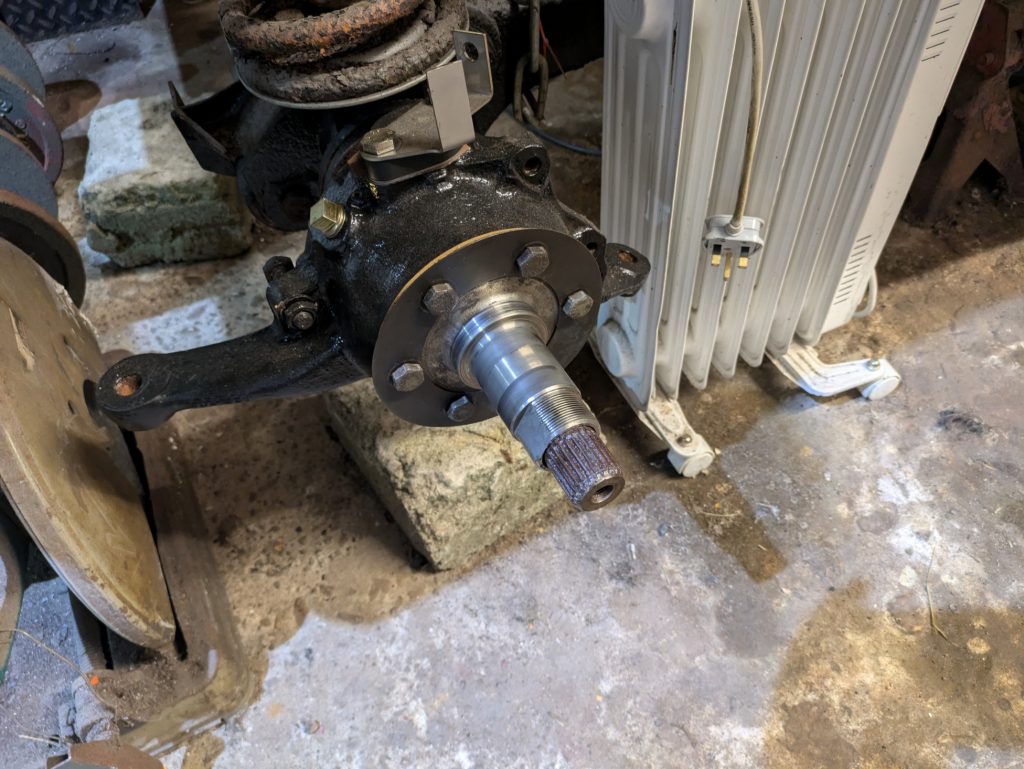
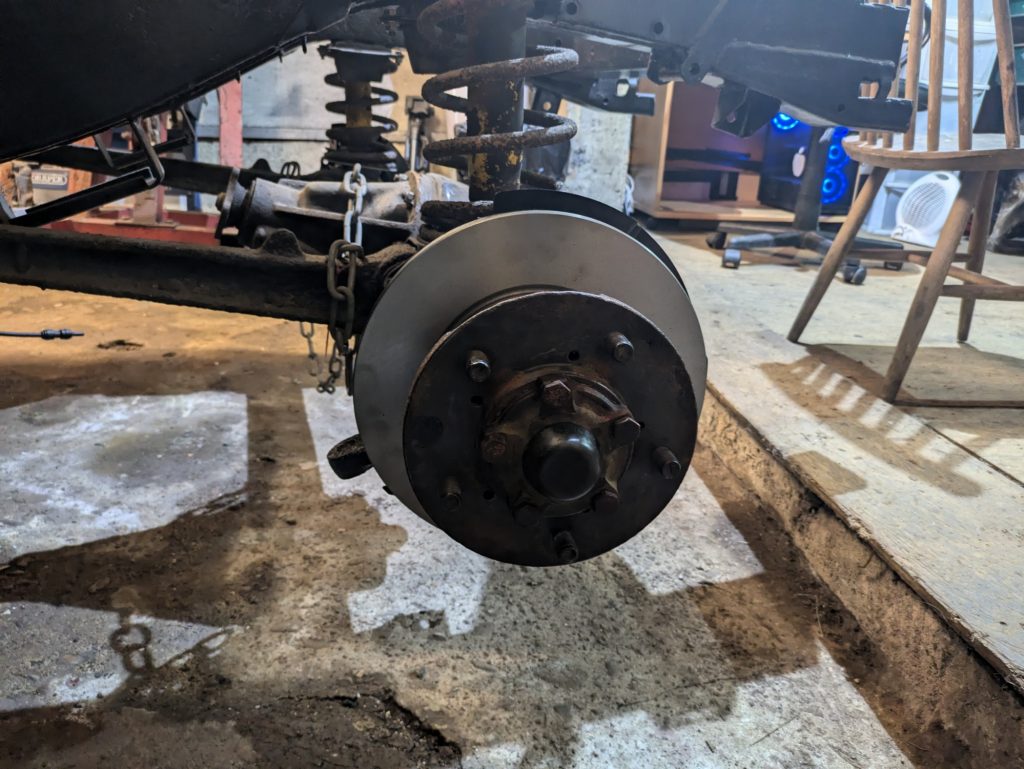
On the axle front, I’ve turned my attention to the front axle, where I’m reusing parts from a Discovery I stripped down. These include hubs and stub axles, both in good condition, so I’m cleaning and fitting them onto the Defender’s front axle. I’ve also purchased new brake discs and brake back plates, alongside genuine lock washers for the wheel bearing nuts and a genuine stub axle mud shield. The brake upgrades will ensure improved stopping power and longevity. I noticed some small differences between the Defender and Discovery hubs, but all the important parts—spline count, bearings, and seals—are identical, meaning they’ll fit well. Using these parts should give the axle a solid, reliable rebuild, and they may even prove more durable due to the updated design on the Discovery components.
It’s slow and steady progress, and I’m aiming to have more done by spring. With these upgrades, the Defender will be well-prepared for the road once the weather improves.
Key Points:
Reused Discovery hubs and stub axles, purchased genuine lock washers for the wheel bearing nuts, new brake discs, brake back plates, and a genuine stub axle mud shield.
Restored the heater box using electrolysis and painted it with Tetrosyl black.
Used duct tape as a temporary fix for rusted-through areas, planning a full repair with the Allisport heater matrix upgrade.
Repaired snapped studs holding the blower motor with Araldite epoxy and new studs.
Received genuine Land Rover heater box to bulkhead seal and using galvanised brackets modified to fit the Allisport heater matrix.
Ordered an RDX Big Power Fan and planning to upgrade to an RDX blower resistor, which may offer improved durability due to modern materials.

20th of October 2024
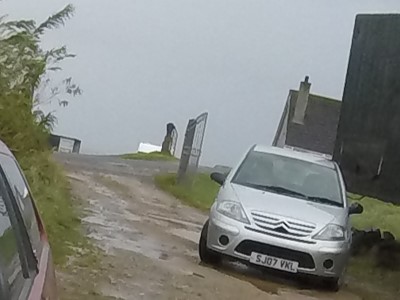
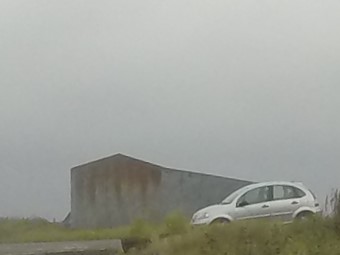
Post 1: Citroën C3 – Moving On to New Projects
Why I Decided to Move On from the Citroën C3
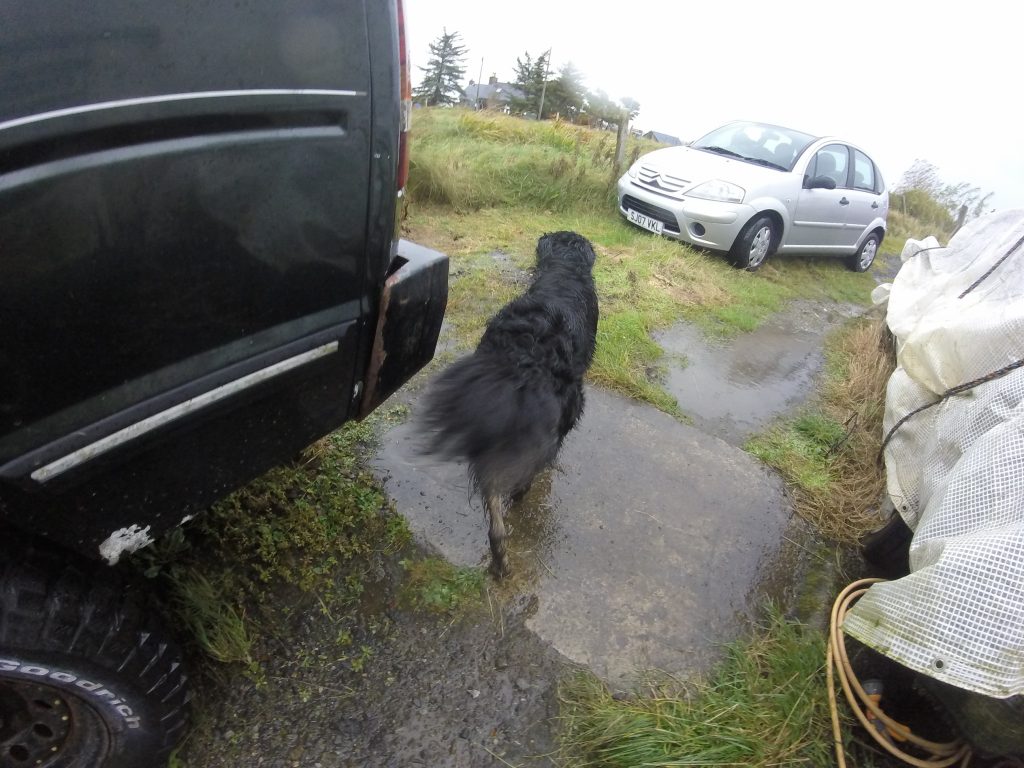
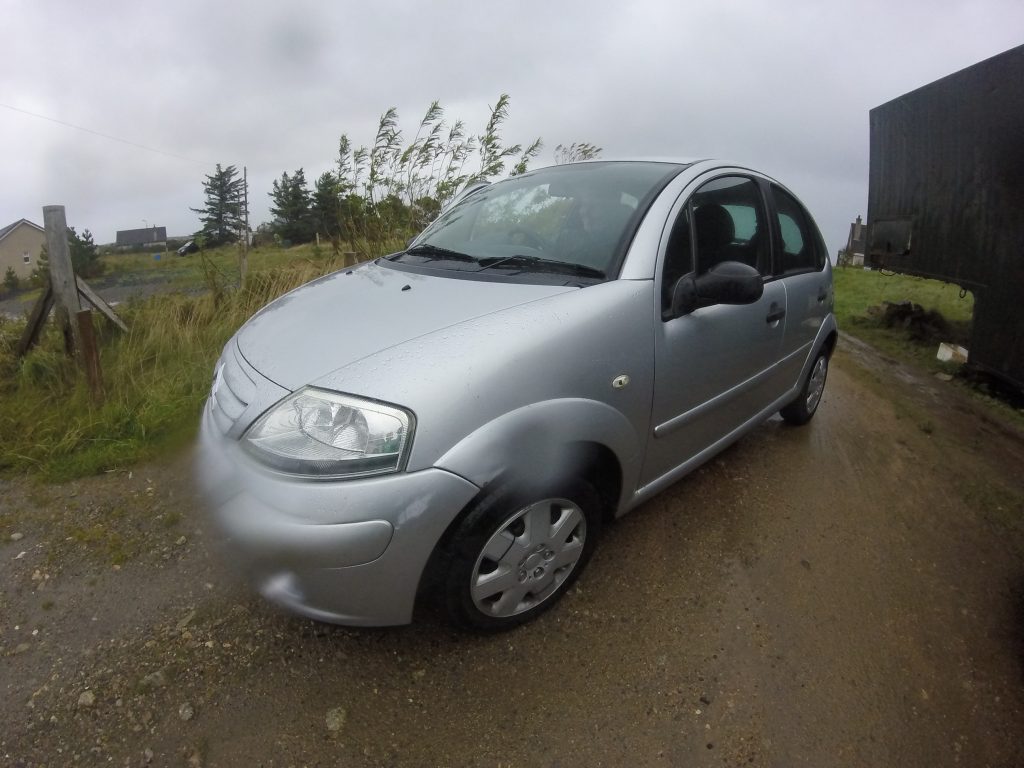
While the Citroën C3 served me well for a time, it became clear that it wasn’t the best fit for my needs. One of the main challenges was transporting my full-suspension mountain bike, which required folding down the rear seats and pushing the front passenger seat forward just to fit it in. This meant I couldn’t take any passengers along for trips. Additionally, when working on vehicles, I often need to transport large parts like engines or gearboxes, and the C3’s limited boot space made this difficult. Even something as simple as taking old parts to the tip was a hassle, as I could barely fit much in one trip.
Another factor was the changing weather. With autumn approaching, reduced daylight and worsening conditions made working on the car outside even more difficult. Given the growing demands of my other projects, such as the Land Rover Defender and Ford Mondeo, I decided to simplify things. The C3, while reliable, wasn’t suitable for the tasks I needed it for. Fortunately, my brother was looking for a car, and it fits his needs perfectly. Selling it to him allows me to focus on my larger vehicle projects without the hassle of trying to keep the C3 in shape.
Key Points:
Sold to my brother, allowing me to focus on bigger projects.
Difficult to transport my mountain bike and large car parts like engines and gearboxes.
Limited space for disposing of old vehicle parts during tip runs.
Challenging to work on the car outside with worsening weather and reduced daylight.
28th of September 2024
Introducing the Land Rover Defender Project
1. Introduction:
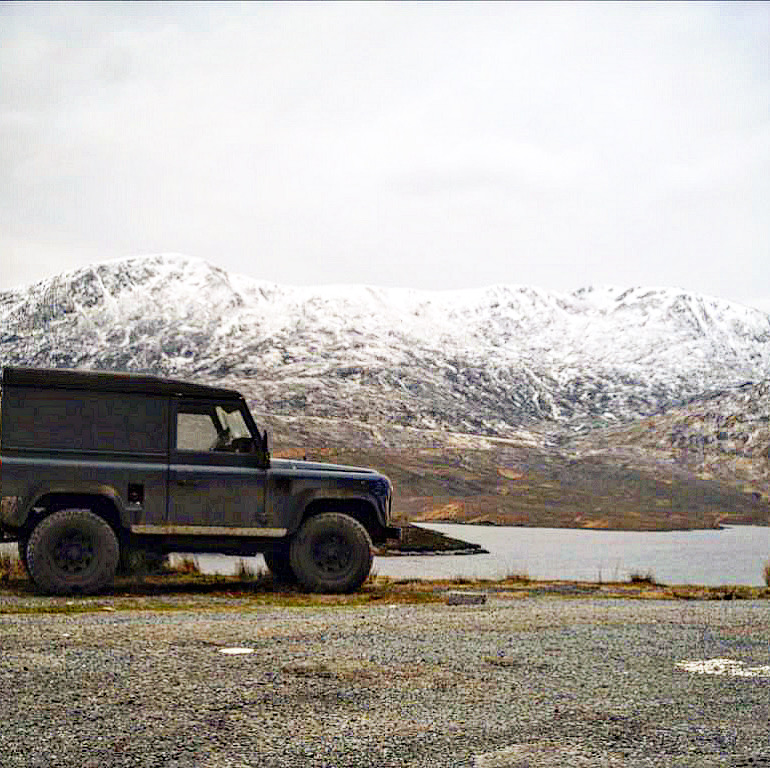
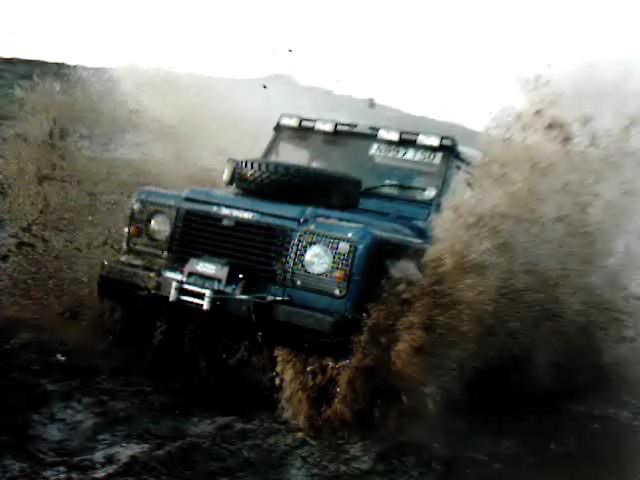
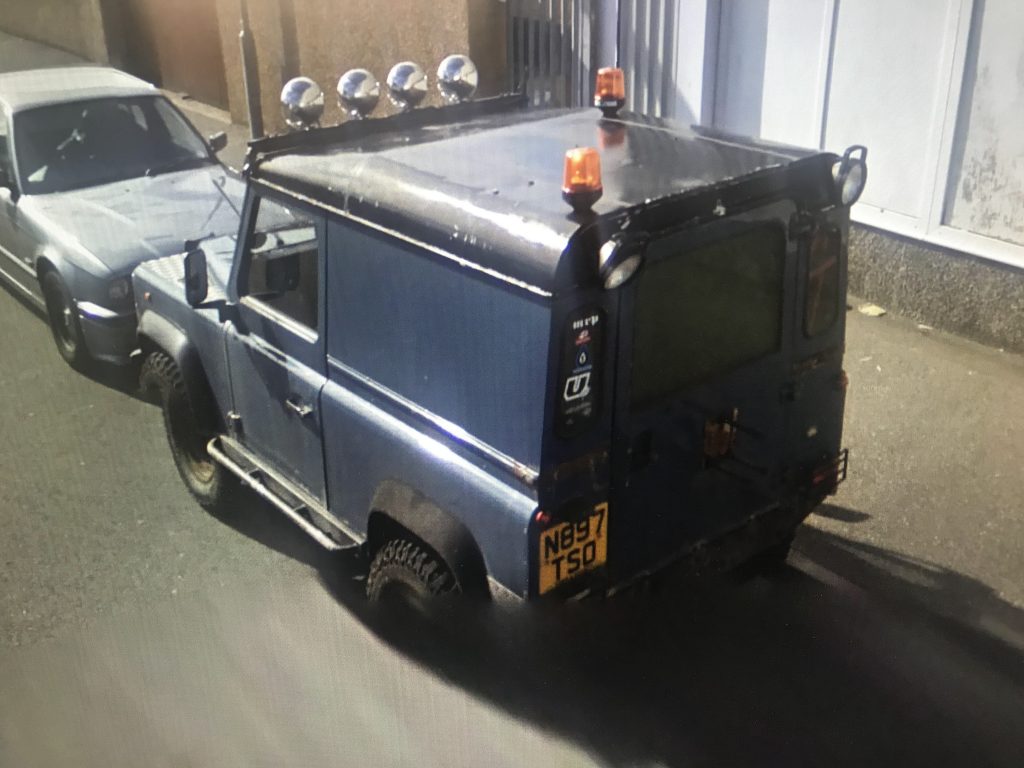
Welcome to the beginning of a new adventure with a vehicle that has been a long-time dream of mine—a 1995 Land Rover Defender 300Tdi. I’ve always wanted a Defender, and in February 2007, when the time came to replace my daily driver, I made the decision to get one. This Defender started as a hardtop model with van sides, but I’ve since swapped those out for County-style sides with windows, transforming its look and functionality.
2. Current Condition:
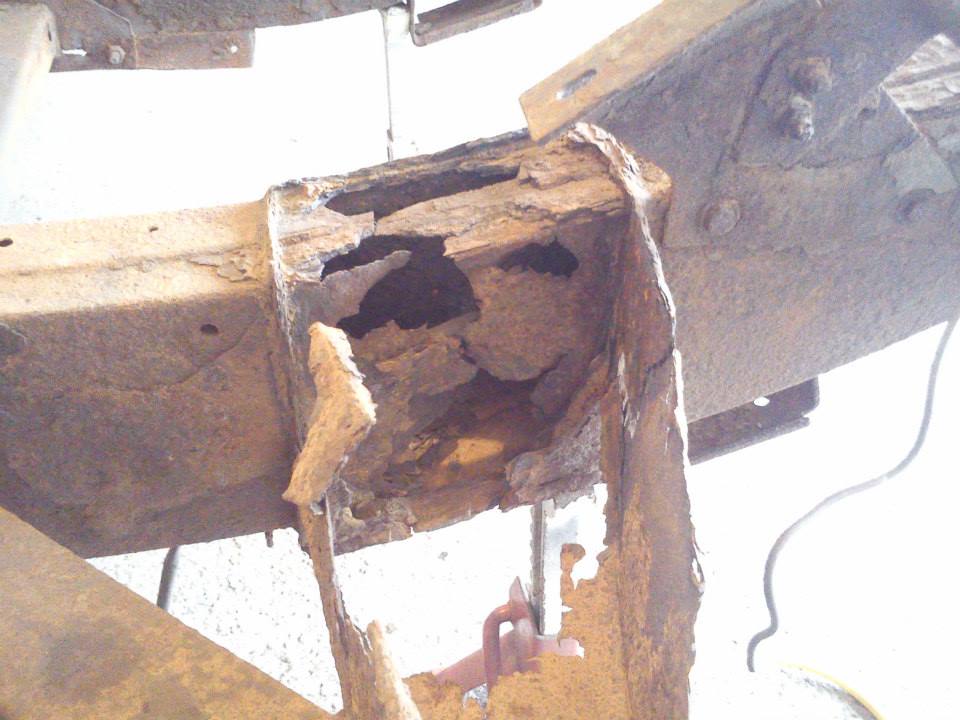
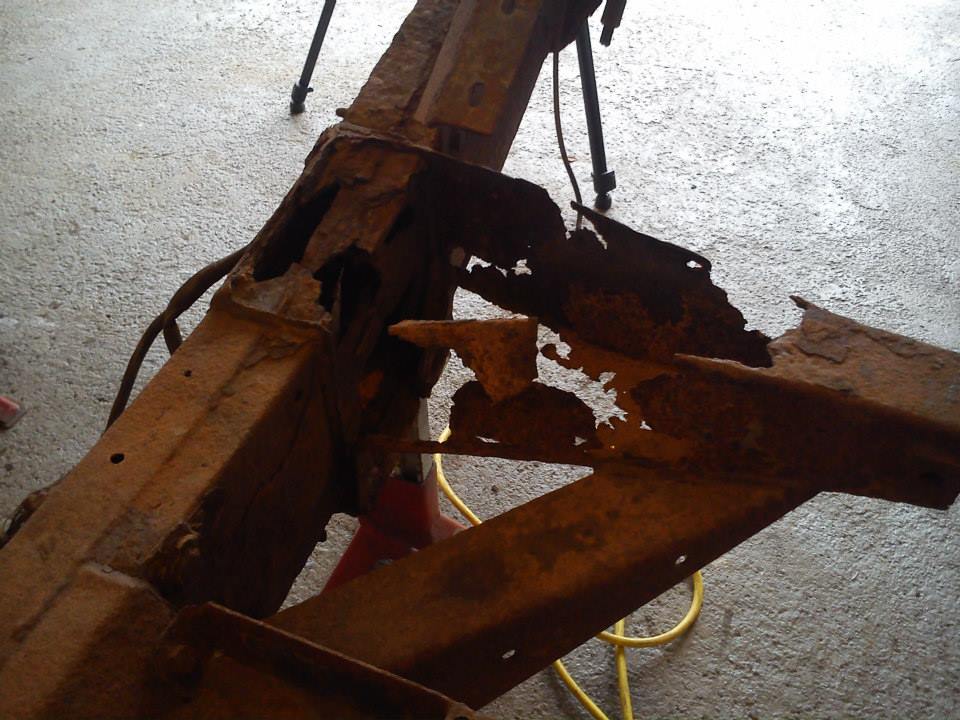
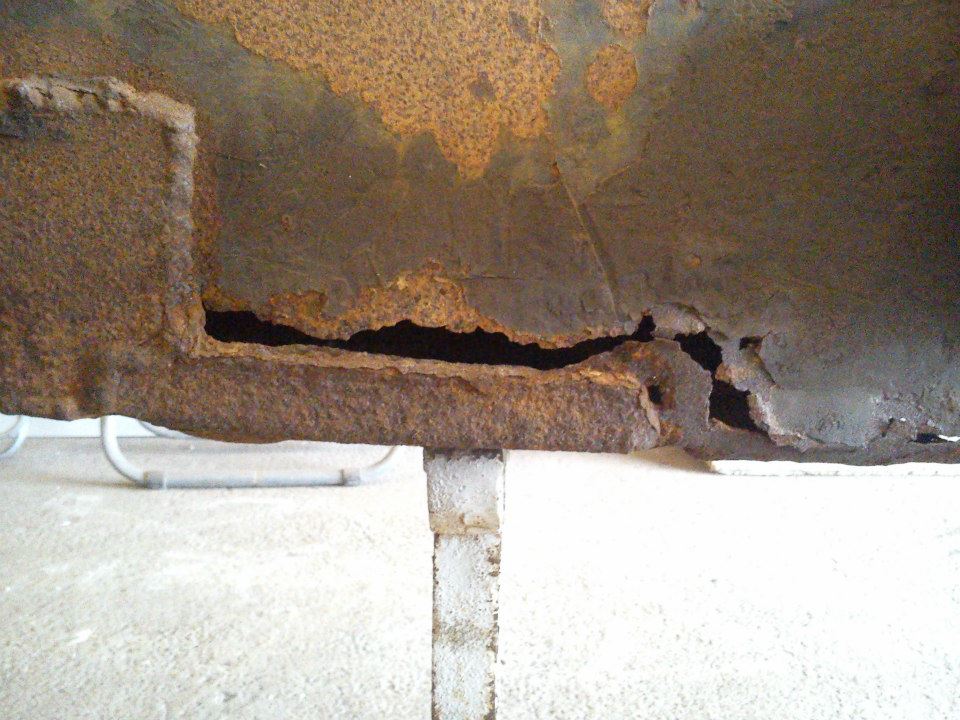
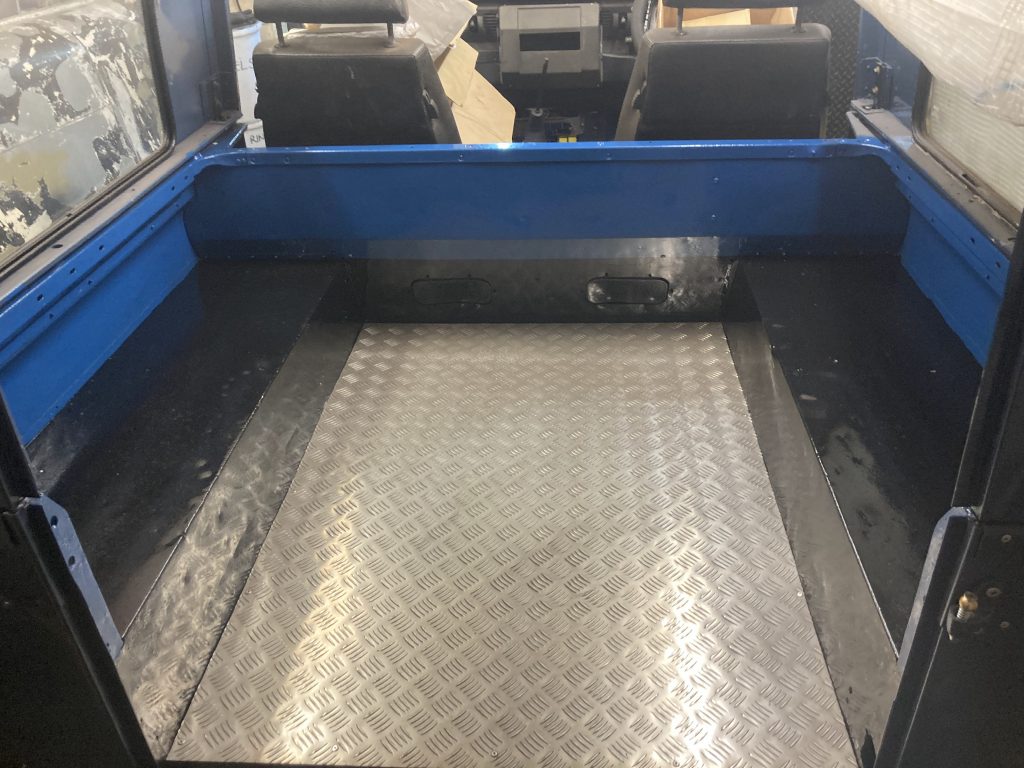
When I first purchased the Defender, it was far from perfect, and over the years it has seen its fair share of wear and tear. A full rebuild became necessary, starting with a complete chassis replacement. Today, much of the bodywork is back on, and a lot of the mechanical, wiring, and interior work has been completed. One of the remaining major tasks is rebuilding the engine. Initially, I didn’t think it needed an overhaul, but after some persuasion, I decided to go for it—there’s no turning back now!
This rebuild is not about creating a pristine, showroom-quality Defender. Instead, I’m aiming for a vehicle that looks well-used but cared for, reflecting the story it has lived. I’ve deliberately left some imperfections, as I would have done years ago when I was young and learning. It’s important that it feels authentic—a working vehicle with the character to match.
3. Project Goals:
The vision for this Defender is clear: a reliable, rugged vehicle that wears its history with pride. I want it to look as though it’s been on the road all this time, with various running repairs carried out over the years. There will be no attempts to hide its imperfections or make it a “garage queen.” Instead, it will embody the spirit of a Defender—ready for whatever comes its way. Key aspects of the build include:
- Completing the engine rebuild and ensuring all mechanical systems are in top condition.
- Reassembling the bodywork and interior to a standard that reflects a life of use and maintenance.
- Retaining and showcasing the vehicle’s patina and history, rather than erasing it.
4. Challenges and Plans:
The most significant challenge has been sourcing parts. With very little available locally, I often find myself waiting for deliveries after ordering parts online. This has slowed progress considerably, but it’s all part of the process. The goal is to complete the build as soon as possible, but I’m not setting a strict deadline. Life has a way of interrupting plans, and I want to enjoy the process without rushing.
5. Timeline and Expectations:
Although there is no set target completion date, I’m motivated to get the Defender back on the road sooner rather than later. Once completed, there’s a particular spot I want to return to—a place where I took a photo on the day I bought it. The plan is to recreate that picture all these years later, capturing the journey this Defender and I have taken together.
6. Closing:
I’m excited to share this journey and document the process, from the challenges of sourcing parts to the satisfaction of seeing the Defender take shape. Whether you’re a fellow Land Rover enthusiast or just curious about the restoration process, I hope you’ll join me as I bring this Defender back to life. Stay tuned for updates, insights, and plenty of hands-on work as we transform this vehicle into something truly special.
21st of September 2024
Comprehensive Vehicle Inspection: Identifying the Repairs Needed for My 2007 Mk3 Ford Mondeo 2.2 TDCi Estate
After recently replacing the radiator on my 2007 Mk3 Ford Mondeo 2.2 TDCi Estate, it was time to take a closer look at the rest of the car. Given its age and a recent incident involving a ditch, I decided to carry out a full inspection. I wanted to make sure I had a clear picture of everything that needed attention, from MOT-critical issues to minor repairs.
Starting with an MOT Checklist
I began by downloading and printing off an MOT checklist. This was a great starting point to identify the major issues that would prevent the car from passing the test. Here’s what I found:
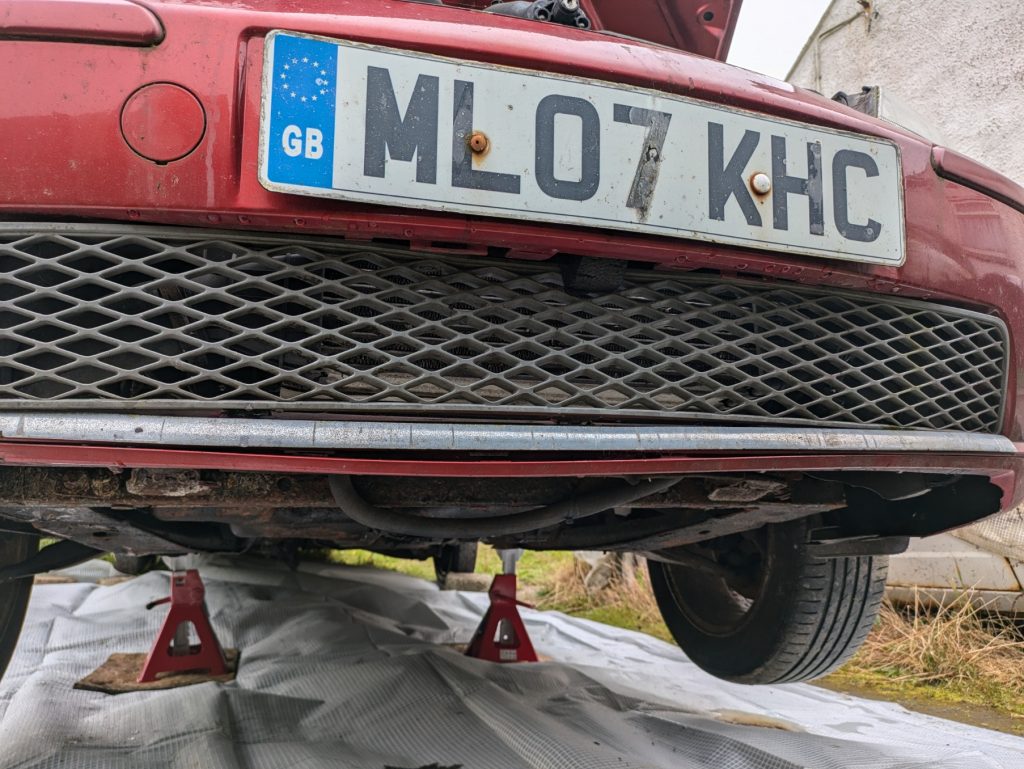
- Unreadable Number Plates: Both front and rear plates were too faded to pass, so replacements are a must.
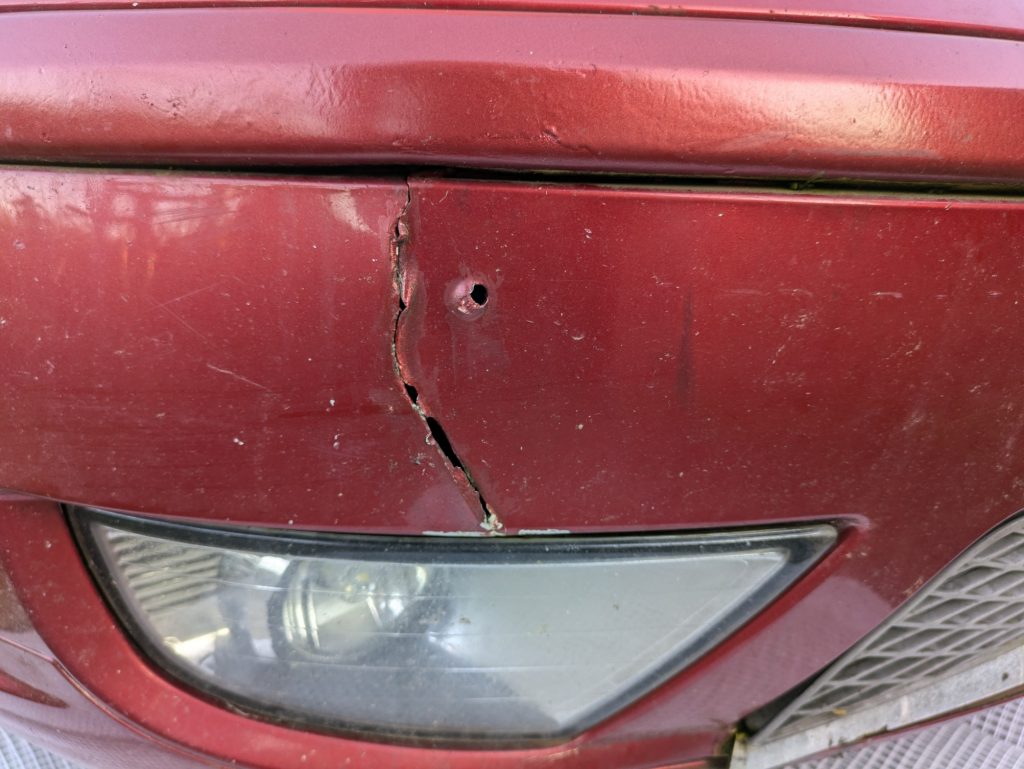
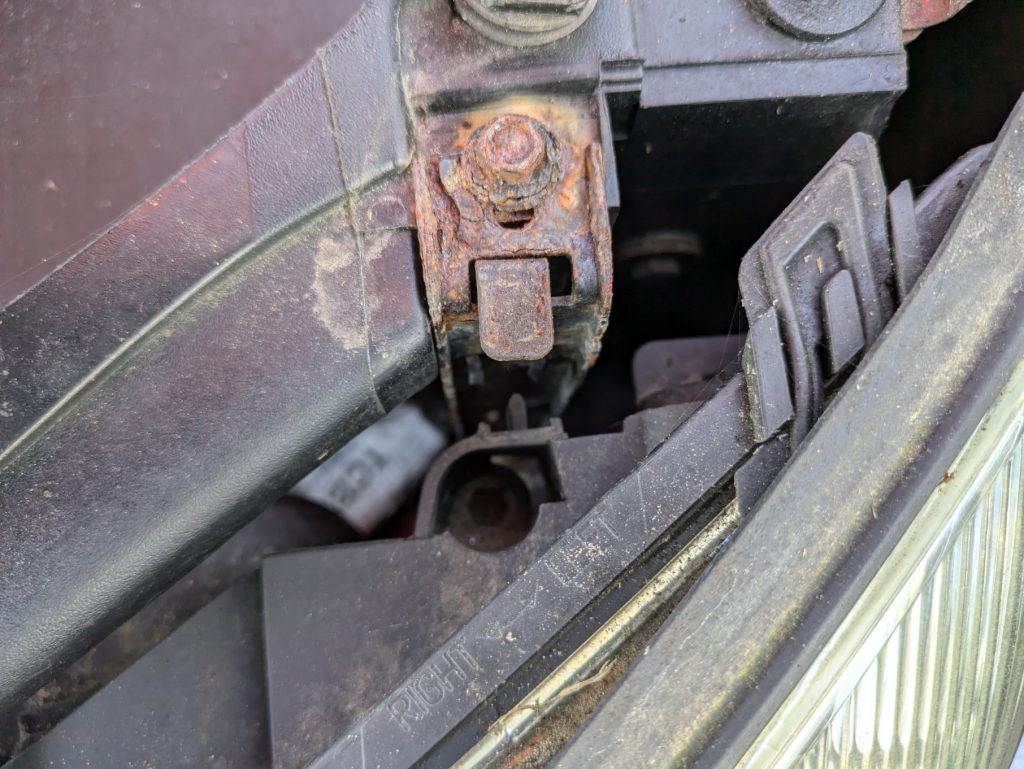
- Insecure N/S Headlight: The headlight mounting bracket was damaged during the ditch incident, making it unstable and potentially dangerous.
- Temporary Wheels: The car is currently on temporary wheels, and I need to fit a full set of tyres for the original 18″ wheels.
- Rear Shock Absorbers: I had replaced these with cheap eBay parts a while ago, but they’re not performing well. I’ll need to upgrade to quality shocks to ensure proper handling.
- Corroded Areas: There are a few corrosion-related issues:
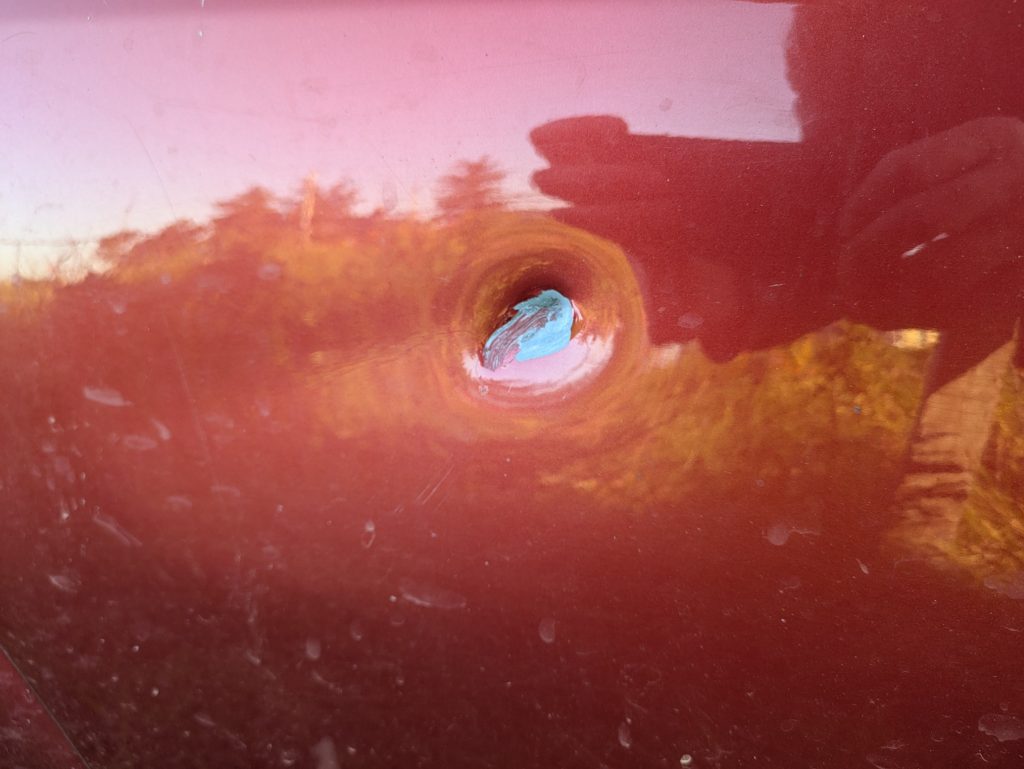
- A hole in the driver’s door due to previous damage.
- A hole in the O/S sill.
- N/S/F brake pipe showing significant corrosion.
- Brake System Issues: All four brakes are binding, and the disc surfaces are pitted and corroded. Additionally, the brake hose ferrules are corroded, so they’ll need replacing.
Digging Deeper: A Full Vehicle Inspection
Beyond the MOT checklist, I conducted a thorough inspection of the entire vehicle to identify any additional damage or issues. Here’s what else I found:
- Bodywork and Exterior Damage:
- Radiator Grill Mountings: These are broken and need replacement.
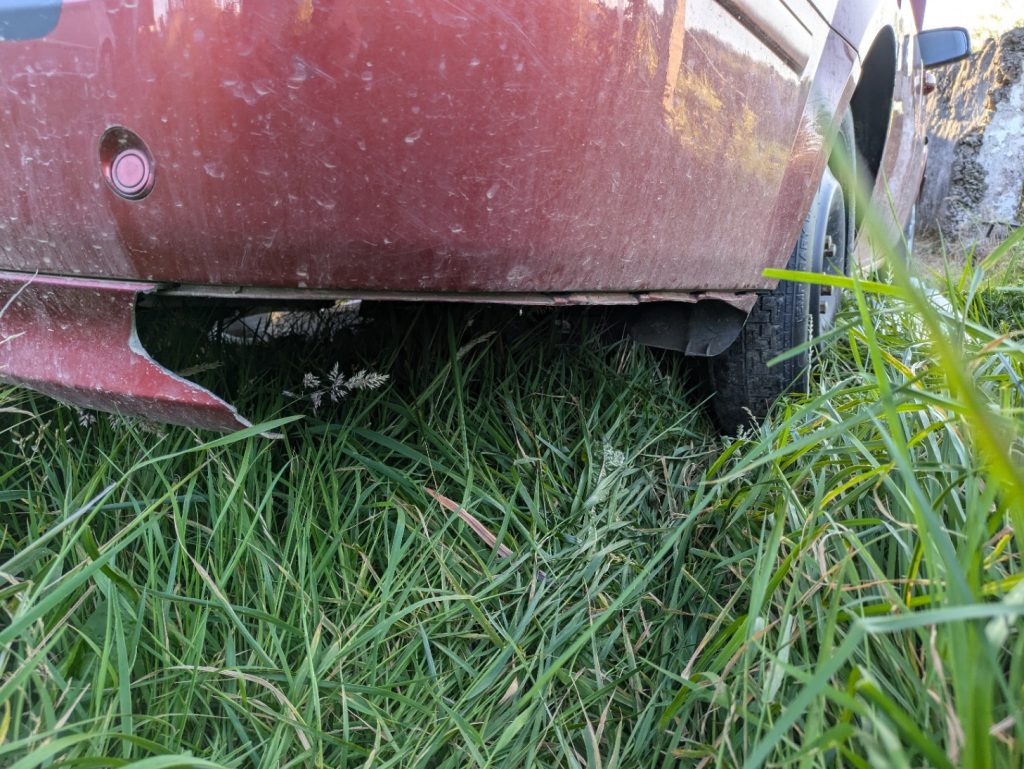
- Bumpers: Both the front and rear bumpers have cracks, splits, and missing sections—possibly from the ditch incident. These need to be fixed to avoid sharp edges, which could also be an MOT fail.
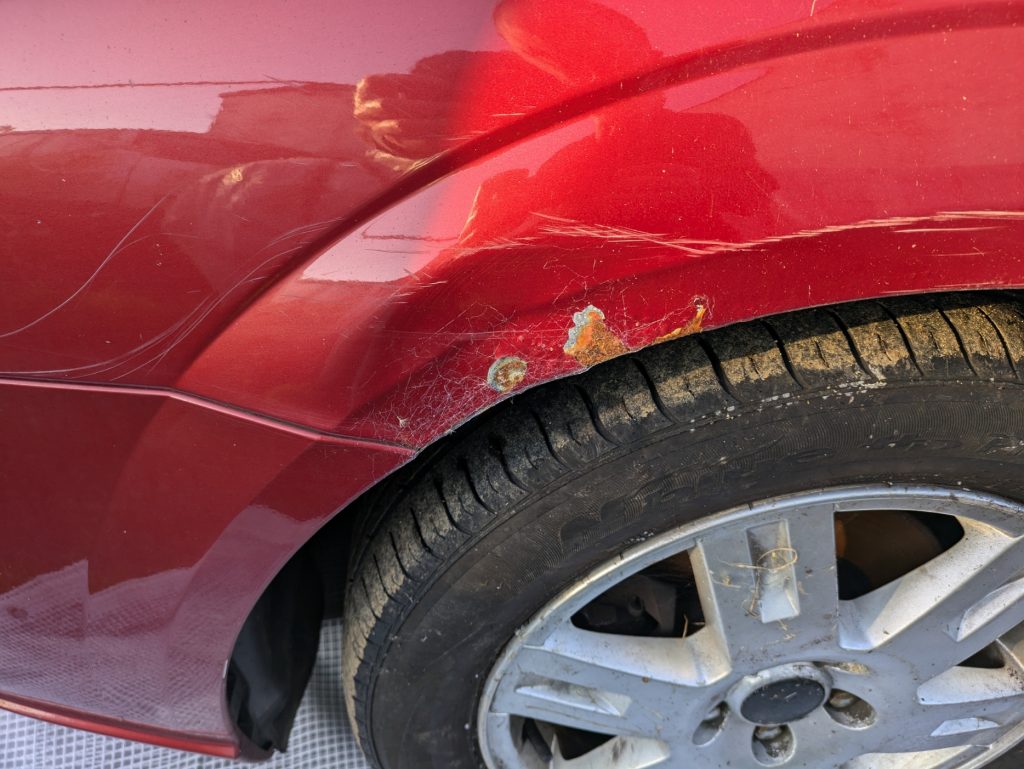
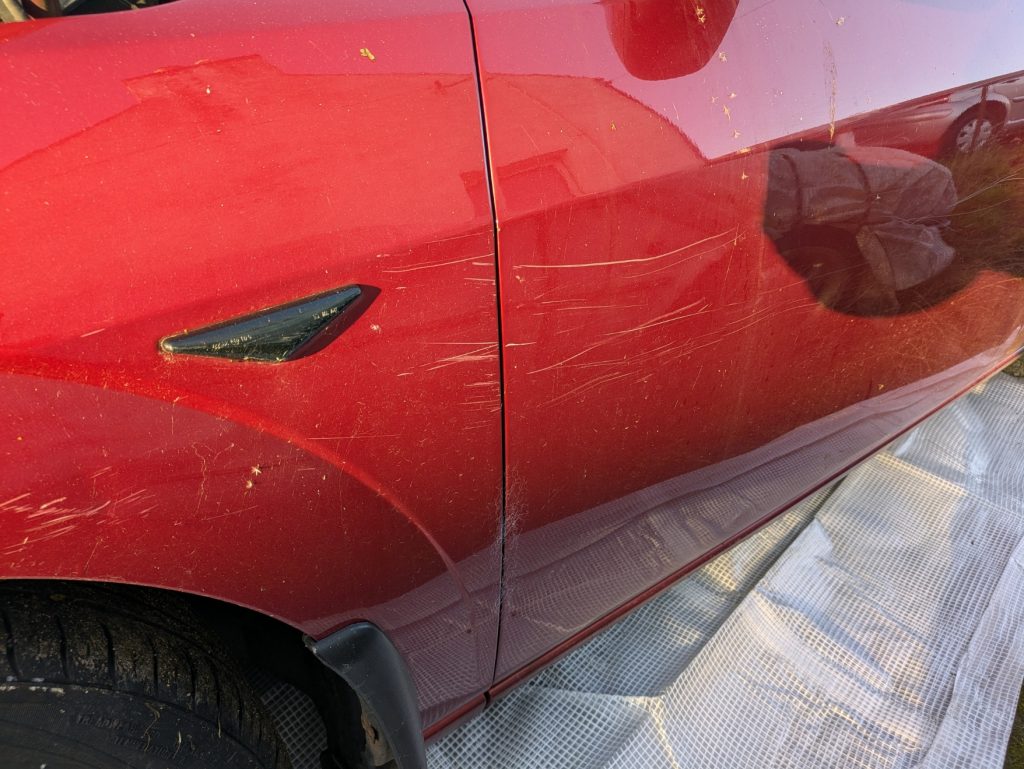
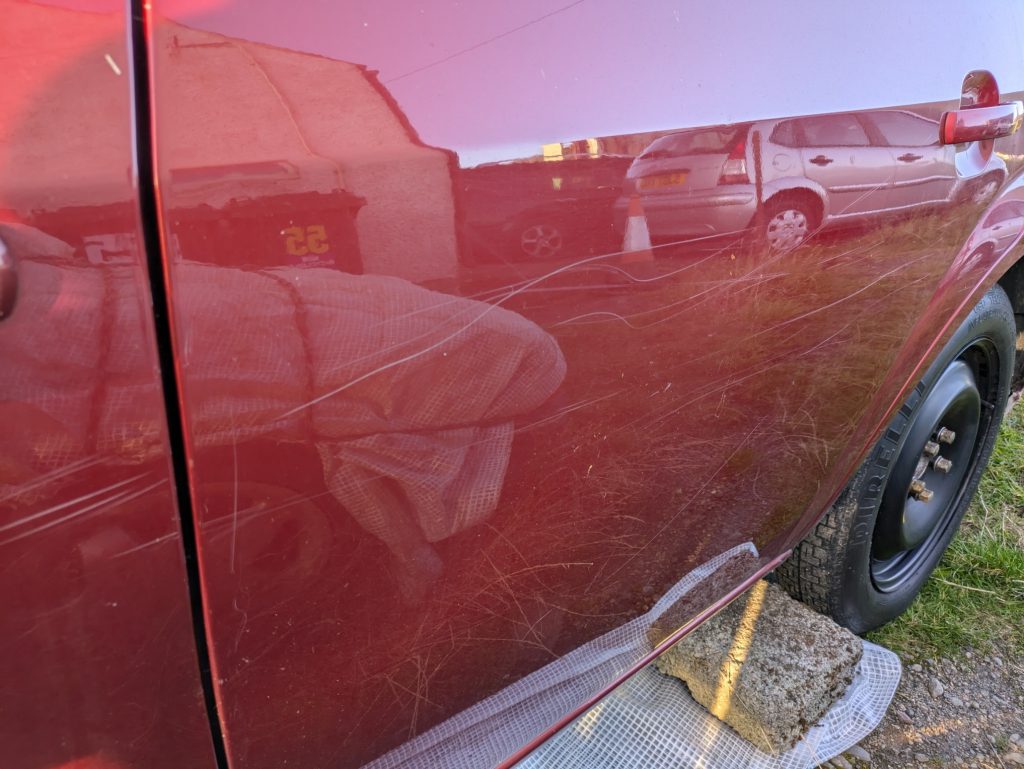
- Bonnet and Body Panels: The bonnet has a dent, the N/S/F wing is dented and starting to corrode, and there are several long scratches down the N/S of the car. The O/S/R door and bootlid also have dents.
- Corrosion Issues:
- Roof Corrosion: There’s noticeable rust on the leading edge of the roof above the windscreen.
- Undercarriage Damage: There’s a scrape and dent under the car from the ditch incident, and the front subframe is also dented. While not critical, it’s something to keep an eye on.
- Mechanical and Alignment Concerns:
- Wheel Alignment: I wasn’t able to check the alignment properly. Given the four-wheel adjustment on this car, I’ll need to take it to the mainland for alignment once it’s roadworthy.
- Interior and Electrical Issues:
- Instrument Cluster and Switch Backlights: The dashboard lights and switch backlights aren’t illuminating, making it impossible to see the speedometer in the dark—a safety concern and an MOT issue.
- Reversing Sensors and Cruise Control: Both systems are currently inoperative.
- Window Regulators: Both the O/S front and rear window regulators aren’t functioning.
- Entertainment System Woes:
- I upgraded the car’s standard head unit to an Android-based touchscreen unit, which also serves as a display for the retrofitted reversing camera. However, it’s been a bit of a let-down—slow, buggy, and not great for playing music. The supplier hasn’t been very helpful, so I’m debating whether to fix it or replace it.
Prioritising the Repairs
This inspection helped me categorise the issues into three main groups: MOT-critical, safety-related, and general repairs. The priority will be to address the MOT failures, ensuring the car is roadworthy and compliant. After that, I’ll move on to safety and structural repairs before tackling the less critical cosmetic and usability issues.
It’s a long list, but having a clear plan of action makes it more manageable. The next step will be to start knocking off these items one by one, beginning with those that are essential for passing the MOT.
I’ll keep you updated as I make progress, and I’ll be sharing more details on the repair process for each of these issues. Stay tuned for the next steps in bringing my Mondeo back to its former glory!
14th of September 2024
Citroen C3 – Tackling a Temporary Brake Caliper Repair Amidst Unpredictable Weather
Introduction
Repairing a seized brake caliper can be a challenging task in the best of conditions, but throw in some unpredictable weather and limited workspace, and you’ve got a real test of patience and resourcefulness. Recently, I faced just such a scenario while working on my Citroën C3. The car’s front brake caliper had seized, and with a hole melted in the piston dust boot from excessive heat, I knew a replacement was inevitable. However, I needed a temporary fix to keep the car usable until the new parts arrived.
In this post, I’ll walk you through how I managed a temporary brake caliper repair, navigated difficult weather conditions, and found a suitable spot to work on the car, all while keeping the vehicle roadworthy.
Weather Woes and Workspace Challenges
The day started with a less-than-ideal weather forecast. With strong winds gusting up to 58 mph from the south-southwest and intermittent rain, finding a safe and sheltered spot to work was crucial. Fortunately, I have a container on my property that provides decent shelter from the wind, and the house to the west offered additional protection.
Planning and Preparation:
- Checking the Forecast: The wind was predicted to ease off slightly after 14:00, so I decided to wait until then to start the work. This gave me time to prepare and, more importantly, to have some lunch before tackling the job.
- Choosing the Work Area: Given the wind direction and strength, I positioned the car on the northeast side of the container, where the structure could act as a windbreak. This spot was ideal for reducing the impact of the gusts, and with the house on the west, I had a relatively sheltered space to work.
The Temporary Caliper Fix
Once I had the car in position, I jacked it up and inspected the caliper. As expected, the caliper piston was seized, and the dust boot had a hole melted through it from the excessive heat. This kind of damage is often a sign that the caliper has been dragging for a while, generating enough friction to cause severe overheating.
Temporary Repair Steps:
- Injecting Lubricant: Using the hole in the dust boot, I injected a mixture of acetone and gear oil directly into the piston area. The acetone helps break down any built-up rust or gunk, while the gear oil provides lubrication.
- Freeing the Piston: I carefully worked the piston back and forth to distribute the mixture and loosen it up. This process took some time and patience, but eventually, the piston began to move more freely.
- Assessing the Fix: With the piston moving again, the caliper was temporarily functional. It wasn’t a perfect solution, but it would keep the brakes operational until the new caliper arrived.
Important Note: This is a temporary fix and should not be considered a long-term solution. If you’re dealing with similar issues, be sure to replace the damaged parts as soon as possible.
Making the Most of a Difficult Situation
Working in less-than-ideal conditions taught me a few valuable lessons. Here are some tips if you find yourself in a similar situation:
- Adapt Your Workspace: Use whatever structures you have to create a sheltered work area. A container, a garage, or even positioning your car next to a wall can make a big difference when battling the elements.
- Time Your Work Wisely: Check the weather forecast and plan your work around it. If possible, wait for a break in the weather, but be ready to start earlier if conditions look like they might worsen later.
- Temporary Fixes Can Be Lifesavers: While it’s not ideal, temporary repairs can keep your vehicle functional until you can do a proper fix. Just be mindful of the limitations and keep a close eye on any temporary repairs.
Conclusion
The job isn’t finished until the new caliper arrives and is installed, but I’m glad I was able to keep the car drivable for now. Sometimes, repairs don’t happen in perfect conditions, but with a little creativity and flexibility, you can still get the job done. Stay tuned for part two of this story, where I’ll walk you through the final replacement of the brake caliper and how the car performs afterward.
Until then, drive safe and keep those tools handy!


5th of September 2024
The Journey of Replacing a Radiator on My 2007 Mk3 Ford Mondeo 2.2 TDCi Estate
Every car owner knows the challenges of keeping an aging vehicle in top condition. My 2007 Mk3 Ford Mondeo 2.2 TDCi Estate recently needed some attention after a bit of a mishap involving a misjudged turn and a ditch! My fiancée had borrowed the car and, although she came out unscathed, the radiator didn’t fare so well.
Here’s the story of how I tackled the radiator replacement, along with a few other upgrades that came along the way.
Safety First: New Axle Stands (and a Broken Rib!)
Before I even got started on the repair, I realized I needed new axle stands. My old set had served me for over 10 years and were showing signs of weakening. Not wanting to risk any failure (especially considering I was working with a broken rib), I bought a new set. Crawling under the car wasn’t exactly comfortable, but better safe than sorry!
The Bonnet Lifters: No More Worries About the Bonnet Falling on My Head
Next up, I replaced the bonnet lifters. These were the original ones—nearly 20 years old—and were no longer reliably holding up the bonnet. The last thing I wanted was the bonnet crashing down on me in the middle of the job. New lifters installed, I could now work safely under the bonnet without worrying about it falling on my head.
The Radiator: Navigating Around the A/C Condenser
With the car jacked up and secure, I set about removing the damaged radiator. The challenge here was that the A/C condenser is attached to the radiator, and I didn’t want to disconnect it because of the refrigerant inside. Carefully working around the condenser, I was able to remove the old radiator and install the new one without disturbing the A/C system.
As I neared the end of the job, the Scottish weather decided to throw some rain into the mix—adding to the fun! But I managed to get the new radiator in place despite the less-than-ideal conditions.
The Coolant Saga: Waiting on the Right Stuff
After the radiator was installed, I hit another snag. I’d forgotten that I had used some of my coolant on another car, and living on a Scottish island meant there wasn’t any of the correct grade available locally. So, I ordered Ford Premium Plus antifreeze from Burton Power to ensure I was using the best quality coolant for my Mondeo. When it arrived, however, I noticed it was POAT (Phosphated Organic Acid Technology) antifreeze instead of the premium product I initially ordered.
What Is POAT Coolant?
POAT coolant is a modern long-life antifreeze designed for modern engines, especially those with aluminum components. It provides excellent protection against corrosion and scaling, making it a great choice for my Mondeo. Even though it wasn’t the exact type I expected, it’s actually a solid option that should work well in the long run.
Refilling the System and Running the Engine
Once the POAT coolant arrived, I refilled the system, making sure to properly bleed it to eliminate any air pockets. I ran the engine for a while to check for leaks and ensure everything was functioning as expected. Everything worked as it should, and I was satisfied with the result.
What’s Next?
Although the radiator replacement is now complete, there’s still some other damage to fix from the original ditch incident, and the car will need an MOT before I can take it out for a proper test drive. But with the new radiator and coolant in place, the Mondeo is one step closer to being back on the road!


